Puzzle Toys for Your Dog

Food Puzzles

Photo Courtesy Pat Koven, LVT, KPA- CTP

Food toys are not always better just because they last longer and not all dogs will like all puzzles. Since they are for your dog’s enjoyment, the toys should not be difficult or frustrating and your dog will decide which games they like.

Your dog may not bother trying a frustrating game. Easy ones with quick wins can be a way to introduce your dog to food puzzles. Your newly adopted shelter dog or young puppy may seem scared of a food toy so make sure it is an appropriate choice.

At 8 weeks old, a puppy may not like a puzzle but might prefer licking toys. A week later, try the puzzles again with a teaspoon of wet dog food and your dog may give it a chance.

Start with easy food toys and games and modify as needed. A dog who is sound sensitive will not want a toy that creates a lot of noise, and a dog who has never used their paws or mouth to manipulate a toy may not like one that keeps rolling away.

Puzzle toys can be easy and low-cost. These games can be very successful and only last a few minutes:

  • throw kibble on the grass;
  • roll up kibble in a rug or towel;
  • toss treats in a low-sided cardboard box;
  • smear wet food on a licking mat;
  • sprinkle food in a snuffle mat or a muffin tin. 
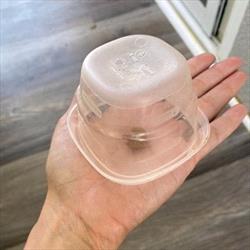
Willy with a Licking Pad.

Photo Courtesy Pat Koven, LVT, KPA- CTP

If your dog has enjoyed quick, easy games and you think they would enjoy some more complex ones, add some variation. A puzzle toy stuffed with your dog’s soaked kibble or wet dog food and then frozen can be more challenging.

If your dog is leaving food in the toy, the game might not be right for your dog. Start simply with a small amount of food in the puzzle toy, or just a few treats in the grass or on a towel, and when they finish all the treats, add more. This can be a fun way to introduce food toys to dogs and make it a social game with you.

When using food puzzle toys:

  • separate multiple dogs so they do not compete for them;
  • supervise your dog so they do not destroy them;
  • make sure they are the appropriate size for your dog;
  • clean them thoroughly after each use;
  • use food that is safe and appropriate for your dog.


Cat Low Stress Handling® Blood Draw Visit: Moment of Truth

#1 Cupcake gets ready for the blood draw.

Photo Courtesy of Tabitha Kucera, RVT, CCBC, KPA-CTP

Many cats are afraid at the veterinary hospital which can make it difficult, if not impossible, to examine the cat and provide the best care possible. Changes in temperature, heart rate, respiratory rate, blood pressure, and even blood glucose can occur, making it hard to determine if the cat is ill or in distress.

In addition to a physical exam, some cats require bloodwork to diagnose a disease or monitor their overall health. Drawing a cat’s blood can be a challenging process when they are afraid or uncomfortable. The good news is veterinary professionals can use these Low Stress Handling® techniques to minimize the cat’s distress during this procedure. 

Step 1: Setting up the room

• The client can bring in the cat’s bed from home as well as their favorite treats.
• Before starting, make sure all needed items for the exam and blood draw are in the room to minimize entering and exiting. This will help to decrease wait times and give an opportunity for the cat to acclimate to the room.
• A non-slip mat should be placed on the table to provide warmth and traction when the procedure is performed.
• The cat’s favorite food can be offered prior, during, and after this procedure. You can also use petting or play if the cat enjoys this.
• Play classical music to help minimize stressful sounds throughout the hospital. If your hospital doesn’t offer this, you could play it from your phone or other device in the room with the cat.

Step 2: Prepping for the blood draw

• When choosing a location for a blood draw, consider where the cat is most comfortable, as well as avoiding any sensitive or painful areas.
• Prior to the blood draw, topical lidocaine can be applied to the location on the leg where the needle will be placed.
• Find the position in which the cat is most comfortable. For many, this may be the sternal position (see picture #1).
• A small amount of alcohol can be applied with gauze or cotton balls. Using a spray bottle to apply alcohol can be scary to some cats. Others may find the smell unpleasant.
• As an alternative, water or chlorhexidine may be used.

#2 Rear legs are gently turned while allowing Cupcake to remain in a natural sternal position.

Photo Courtesy of Tabitha Kucera, RVT, CCBC, KPA-CTP
#3 Cupcake’s attention is focused on the lick mat, not what’s happening elsewhere.

Photo Courtesy of Tabitha Kucera, RVT, CCBC, KPA-CTP

Step 3: Restraint

• Support the cat’s entire body when positioning for the blood draw.
• Adjust handling based on each cat and their individual response to restraint.
• The cat’s rear legs should be gently turned while allowing the cat to remain in a natural sternal position (see picture #2).
• The technician or assistant should avoid excessive restraint or stretching the cat into unnatural and painful positions. Excessive restraint results in resistance. Pulling and stretching legs can be painful and uncomfortable. The cat may begin to resist and exhibits stress because the position is not natural and can cause pain.
• Apply gentle pressure to the leg when holding off the vein.
• Continuous petting around the head and neck can be used to encourage the cat to maintain their chosen position (if they enjoy petting).
• Allow the cat to hide if they prefer.
• The person restraining should not loom over the cat or continuously stare, which may cause the cat to be uncomfortable.
• Communication between the person drawing blood and the person restraining the cat is important, especially as the needle is removed. This allows for the person restraining the cat to apply slight pressure to the blood draw site and gives the cat an opportunity to readjust and maintain a comfortable position. (see photo #3)

Continually assess body language to make sure the cat is experiencing minimal stress throughout the entire procedure.

How to Prepare Your Cat for a Low Stress Handling® Blood Draw Visit

Veterinary visits can be stressful for everyone, especially cats. Using the “less-is-more” approach, Low Stress Handling® Principles of Handling provides an opportunity for you to help your veterinarian perform a safer and more thorough physical exam along with any necessary diagnostics (blood draws, radiographs, ultrasound) needed to diagnose and treat your cat appropriately.

These Principals of Handling include:

Greetings

• Avoid staring and direct approach.
• Move calmly and speak in quiet tones.
• Do not invade personal space. Always invite your cat into your space.
• Use distractions and rewards like food, brushing, and play.

The Carrier

• Carry the carrier from the bottom, not the handle: This allows your cat to feel more stable and minimizes back and forth movement, which reduces nausea and discomfort while also decreasing the risk of the carrier breaking and your cat getting loose.
• Cover the carrier with a pheromone-infused towel.
• Always elevate the carrier off the floor in the waiting room.
• Place the carrier on the table or floor in the exam room.
• Do not dump, tip, or shake the carrier.
• Open the door and allow an opportunity for your cat to exit on their own.
• Use treats and/or toys to lure the cat out of the carrier.
• If your cat does not come out of the carrier on their own, remove the lid before gently lifting your cat out of the carrier.

Comfortable Environment

• Perform the examination where your cat is most comfortable (owner’s lap, cat carrier).
• Have everything already in the room needed for the visit (blood collection kit, vaccinations, equipment for examination, etc.) before starting.
• Do not continually enter and exit the room.
• Be mindful of sights, smells, and sounds (i.e., avoid barking dogs) that may cause distress.

Use Appropriate or Minimal Restraint

• Always support your cat well and have your hands, arms, and body positioned appropriately so your cat will not feel as if they will fall or are off-balance.
• Adjust your handling based on each cat and their individual response to restraint.
• Be mindful of painful joints and temperature changes (i.e., cold stainless-steel tables)
• Avoid prolonged struggling. More than 1-2 seconds or repeated handling adjustments, consider pre-visit medications or sedation depending on what “needs” to be done that day.
• Avoid unnatural, uncomfortable, or painful positions when possible.
• Do not reposition the cat by pulling on legs, ears, tail, skin, or fur.

Body Language

• Assess body language and adjust handling techniques based on the animal’s individual preference.
• Assess yourself. Our behavior and body language affect the patient’s emotional state.
• Less is often more.

Towel restraint

• There are 6 different types of towel wraps.
• Each towel restraint method requires practice and patience before use.
• Different wraps can be used for various procedures including blood collection, subcutaneous fluid administration, catheter placement, and injections.

Thoughtful changes in the hospital set-up along with a more individualized handling and restraint plan can go a long way in providing a more positive experience at the veterinary hospital for both you and your cat.

House Training Adult Dogs

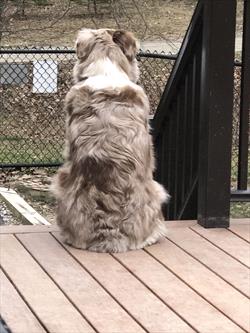
Maddy in the leaves. Photo Courtesy of Pat Koven, LVT, KPA-CTP

When house training an adult dog, the process is the same as with a new puppy. Although you may have been told your new adult dog is house trained, that may not be the case in your home. When first brought home, you may not be able to recognize your dog’s need to go out and they do not know how to go out.

Keep slip-on shoes and a leash near the door so you can quickly take them out when they wake up, after they eat, when they are sniffing for a spot, or looking restless. Be patient and take them outside frequently.

Keep treats handy near the door to grab as you go outside to your dog’s designated potty area. As soon as your dog goes to the bathroom, reward them with several of their favorite treats. Shower your dog with treats when they go to the bathroom outside, don’t wait to treat them after they come back in.

Giving so many treats like this may be frightening to your dog, causing them to refuse the treat. If this happens, remain calm and try putting the treat on the ground near them. If they still refuse the treat, try reinforcing another way, like going back inside or letting them sniff the grass or a tree. You can also try tempting them with other treats to discover what your dog considers valuable.

Adult dogs may prefer to potty on a specific surface. A dog that has spent their life in a kennel may prefer concrete over grass because this is familiar to them. To encourage your dog to go on different surfaces, try:

  • a road or sidewalk or an area with gravel;
  • leaf piles that might resemble wood shavings in their previous kennel;
  • bare ground under a tree or near the garage;
  • a covered porch, a garage, or a pop-up tent if they only previously soiled in the house;
  • a low-sided container such as a boot tray with sod or artificial grass for small dogs.

Some dogs may have been punished for toileting in the house, causing them to avoid going to the bathroom in front of people. Take them out in a safe area on a long leash or someplace where they can potty behind a tree or bush to give them privacy.

Since some dogs have never gone to the bathroom while leashed, try using a lightweight long line and be sure to keep the leash loose, or go to a safely fenced-in area so they do not need to be leashed. For small dogs, an exercise pen on the grass can often work. 

Clancy on his long line. Photo Courtesy of Pat Koven, LVT, KPA-CTP

Making accommodations may be short-term while you find what your dog prefers. Eventually, you can transition your dog to the area you choose. Help your dog understand where you want them to go by using a visual such as wood shavings in the area. Reinforce each time they toilet on the shavings, using fewer shavings until eventually your dog no longer needs the visual.

Similar to training a puppy, your adult dog should not have free run of the house. Use exercise pens, baby gates, or doors to keep your dog with you until they are fully house trained and let you know they need to go out. It can take several months to fully housetrain. For accidents inside, use a good enzyme cleaner to remove odors to help prevent possible future marking behavior. 

If you have any concerns about your dog’s bathroom habits, discuss the issues with your veterinarian to rule out medical conditions. 

Casey stands on pebbles. Photo Courtesy of Pat Koven, LVT, KPA-CTP

Low Calorie Training Treats

Q: My vet told me my dog needs to lose weight so now I can’t use treats for training. What do I do? 

A: Let’s look at the long-term goal first. You won’t be using treats for every correct behavior for the rest of your dog’s life. You only reward them each time when you are first training a new skill, then begin decreasing the frequency of the treats. However, your dog will stop doing the skill over time if you do not periodically reward them. Would you work for free forever?

For a high-value paycheck, you can use lean proteins such as chicken or steak. All rewards should be pea-sized. As a preferred reward, cat treats or cat kibble can also be used in small quantities. Some dogs enjoy vegetables such as carrots or broccoli, which can be given in tiny pieces and won’t add many calories. We want the dog to eat fast so they’re ready to quickly repeat the behavior again. Soft high-value treats are better for this, like chicken and steak. Cheese cubes can be cut into 27 small squares which gives you 27 rewards!

Regular dog kibble can be used as well, especially if your dog is food motivated. You can mix small amounts of the high-value, higher-calorie rewards with the dog kibble so the dry food absorbs some of the taste of the other foods.  

Use your dog’s mealtime as their training time. They will want to eat and then be eager to work. This also gives you a fun time to bond with them at least twice daily.

During the day, use ice cubes and veggies as treats or in puzzle feeders. Carrots make excellent frozen “rawhide” replacements. As your dog is learning new skills, you can start using favorite toys such as squeaky balls, flying discs, and tug toys as rewards too. This will not only cut down on calories but increase exercise.

What Does Managing Behaviors Really Mean?

Photo Courtesy of Pat Koven, LVT, KPA- CTP

A: Management is an important part of the behavior modification process and is a first step in setting up your pet for success. To stop unwanted behaviors from happening, you first must identify the events leading up to that behavior so you can try to prevent them.

We don’t want our pets practicing poor behaviors, yet we want to encourage the good ones. If every time you walked into the kitchen you saw chocolate on the counter, would it tempt you? If you put the chocolate out of sight, it is likely not as tempting. This is not much different for your pet. If your dog is counter surfing, keep all food items away or out of reach. If your puppy eats socks, then don’t leave the socks lying around. If your cat chews on plastic bags, make sure no bags are available to them.

If your dog reacts to other dogs, instead of taking them to a dog park to begin training, practice in your quiet home and yard. Your pet will be more focused on you and not barking at the dog down the street. Before visitors arrive move your dog into another room, to their safe-haven, or behind baby gates. Make sure they have their favorite toys or puzzle feeders. This will prevent the jumping habit and keep stress levels to a minimum.

If your cat is vocalizing because they see another cat outside every day, limit access to the windows. You can close the blinds or put translucent film on the glass. Management may not be the permanent solution to behavior issues, but it is a critical step before modification may begin.