Traveling with Your Cat

March 10, 2022Cats

At some point, you and your cat will need to travel. You may feel stressed by the idea, but with a bit of effort and planning, cats can learn to cope with the trip. Preparing your cat beforehand can make the experience less stressful for both of you.

Preparation

How much preparation is needed depends largely on how you are traveling and the length of time the trip will take. Know the requirements for traveling with your cat well in advance. Most transportation companies have guidelines for cat travel including approved carriers and health requirements. When flying, make sure that your cat will be in a temperature and pressure-controlled area. Extra caution is needed with breeds like Persians and Himalayans as flat-faced cats cannot handle temperature or pressure changes easily.

If your cat has shown distress during past travels, be sure to talk with your veterinarian. If a health certificate is required, your cat will need a veterinary visit. Discuss the use of medications to help your cat feel more comfortable.

A large dog crate can be a great space for cats during longer car rides. A blanket draped over the crate can create a feeling of safety. Photo courtesy of Katharine Schwarz, RVT, KPA CTP

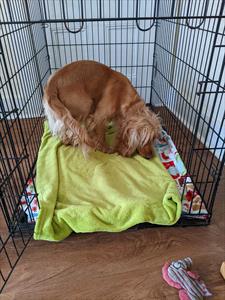
Introduce your cat to the crate early by feeding treats in the crate. Photo courtesy of Katharine Schwarz, RVT, KPA CTP

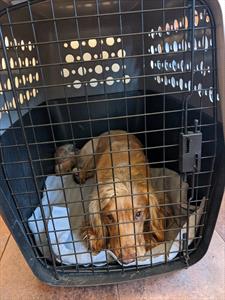
Eventually, you can close the crate for brief periods of time. Photo courtesy of Katharine Schwarz, RVT, KPA CTP


Have the appropriate carrier ready well in advance of your trip and start teaching your cat that the carrier is a great place to be. For long car rides, consider using a large dog crate that can accommodate a small litter box along with space for your cat to rest comfortably.

If you are flying or using any other public transportation, the size of the carrier will likely be limited. Use a pee pad to line the carrier in case of accidents. Cats who are accustomed to wearing a harness with a leash and are comfortable in public may be able to take breaks from the carrier during long trips. Be cautious even when your cat is used to wearing a harness or leash, as some cats may easily startle and try to escape.

Acclimating to the Car

If you are driving, you can acclimate your cat to the carrier as well as the car. Complete the following steps over multiple sessions while feeding your cat treats and watching their body language. Your cat should be more relaxed each session; if not, then stop and go back to the last most successful step.

  1. Once your cat is comfortable in their carrier, practice picking up the carrier for brief periods. The goal is to place the carrier in the car while your cat stays relaxed.
  2. Once your cat is in their carrier in the car, feed them some treats.
  3. Turn on the car and remain parked, feeding your cat treats.
  4. Drive a short distance such as up and down the driveway. Ideally, a passenger can feed treats during this step.
  5. If your cat remains relaxed, increase the distance for each session.

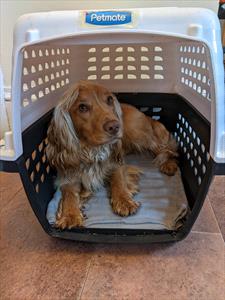
A smaller carrier is appropriate for shorter durations or public transportation. Photo courtesy of Katharine Schwarz, RVT, KPA CTP.

Bring kibble or treats for your cat to make a positive experience. Photo courtesy of Katharine Schwarz, RVT, KPA CTP.

Practicing some tricks in the car such as “touch” can help your cat feel more positive. Photo courtesy of Katharine Schwarz, RVT, KPA CTP.

Practicing some tricks in the car such as “paw” can help your cat feel more positive. Photo courtesy of Katharine Schwarz, RVT, KPA CTP.

During the Trip

Allow plenty of travel time to avoid added stress for yourself and your cat.   Give your cat some time to adjust to the car before you start driving. Bring your cat’s breakfast with you to feed in small portions throughout the trip. Using tricks your cat knows, like “touch” or “paw”, can help your cat focus on something they enjoy.

After Arrival

Your cat will need some time to feel comfortable in their new environment. Prepare a room or safe haven area for them so they can relax. Make sure they have everything they need in this space such as a litter box, hiding spot, scratching post, resting area, food and water. Wait to introduce your cat to any other pets in the home until after they have acclimated.

What Is Cooperative Care in Veterinary Medicine?

Rachel Lees LVMT, KPA CTP, VTS (Behavior), FFCP (Veterinary)

Animal behavior is a crucial aspect of veterinary care.  Whether your pet has pain or just “ain’t doing right,”  the pet’s behavior, body language, and overall demeanor is part of obtaining a thorough and precise physical examination.  Without this type of examination, symptoms and diagnoses may be missed that could make or break the treatment plans.  Without the ability to communicate, the pet may panic causing increased fear, stress, aggression, and anxiety that is associated with handling and restraint. When the veterinary staff is unable to successfully examine or handle a patient, it becomes a quality-of-life concern as the veterinary team cannot provide medical care. Observing behavior is an important part of every pet’s visit.  Staff should discuss behavioral concerns with you and give options for how they will make your pet’s visit as enjoyable as possible.   

Making Cooperative Care the Standard of Care for Each Patient 

Veterinary behavior professionals are often asked how veterinary staff can start using these techniques while keeping things straightforward.  Behavior medicine starts with opening the eyes of the veterinary team to “see” behavior.  Once you visualize a patient’s aggression as fear, stress, or anxiety, you cannot un-see it.  Implementing cooperative care techniques in practice is also a huge change for clinics.  Programs such as Low Stress Handling® and Fear Free® have created membership programs for individuals and teams to create a more behavior friendly atmosphere using special techniques such as towel wraps and minimal restraint methods.

You may notice food is often used during veterinary visits as a distractor. When using this method, it is important that the food be given just before the procedure begins. If your pet stops eating, then the team should stop and assess the emotional state of your pet. The goal is to make sure your pet always associates a positive experience with what’s happening. Sometimes other reinforcers are used such as play, scent, toys, petting, etc. depending on what your pet prefers. This method helps to prevent fear and anxiety but if your pet is already afraid at the clinic these distractors may not be enough. Cooperative care may be the next step needed to help your pet.

Cooperative care provides your pet with an opportunity to opt in or out of a procedure, communicating their consent to treatment. An example of this would be teaching a dog to go to a mat for handling. In training sessions, the pet learns that when they move to their mat, handling will happen.  Therefore, if the dog chooses to go to the mat, they are giving consent to touching.  This teaches them that if they are uncomfortable, they can simply opt out by moving off the mat. They do not need to go to extremes such as biting to stop the handling. Another example is an offered chin rest to allow eye drops, ear cleaning, or nail trims.

Cooperative care is not just limited to the veterinary clinic. Teaching your pet other behaviors to participate in husbandry procedures such as grooming, nail trims, topical monthly flea treatments, eye medicating, etc. can also be done. A cat that voluntarily enters a carrier on cue is easier to take anywhere and less stressful for all. Learning how to prevent certain stressors at the clinic and at home will help your pet accept procedures.

Walking Your Dog

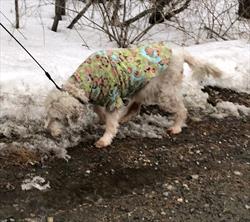
Taking your dog for a walk should be an enjoyable event; walks are the primary reason some people get a dog. For some owners, issues arise that make going on walks less enjoyable. Let’s think about some options to help you both enjoy your walks more.  

Photo courtesy of Melissa Spooner-Raymond, LVT, VTS (Behavior), BS, KPA-CTP, TAGteach Level One

The Purpose of the Walk

Before heading out with your four-legged best friend in tow, know the purpose of your walk. Is exercise your primary reason? Who needs the exercise, you, your dog, or both? Walking improves your cardiovascular health, builds stronger muscles, and lowers your blood pressure and stress levels. However, if it takes you 60 minutes to walk a half mile because your dog insists on eliminating at every mailbox or light post then your heart rate might never make it to the necessary levels for cardiovascular benefit. A simple solution is to walk in an area with fewer distractions. Avoid public parks, neighborhoods, and subdivisions that have many tempting distractions. Instead, choose an open field, a state park, or a beach.

If your health is not the primary goal, then what is? Is your dog the one in need of exercise? Are you trying to improve their physique, or do you have another goal in mind? Often we look to walking as a solution for weight management or to burn off energy. If you have a busy dog that never runs out of energy, then taking them for regular walks seems like the best solution. As with humans, walking has many health benefits for dogs including building muscle and becoming stronger. However, over a period of time, you may notice a walk that previously tired them out no longer has the same effect. While walks are helpful for a dog that needs to shed some weight, they may not be ideal if your goal is to burn off energy. As their stamina increases, more intense walks may be needed to truly exhaust them. A solution to this issue may be to modify the type of walk you take.

Walks as Enrichment

Did you know that about 15 minutes of mental work for a dog is the equivalent of taking your dog on a 1-mile walk? Have you ever worked on a project intensely all day long and after you were done you felt like you ran a marathon? That is because your brain did all the heavy lifting. Mental exercise and brain games are often referred to as enrichment. Enrichment is not only enjoyable but also tiring! You can offer it to dogs in many different forms. Sniff walks are one of the many methods. This form of enrichment puts the responsibility of deciding where to go and how long to stay completely on the dog. If your dog wants to spend 15 minutes sniffing one single spot, let them.  As long as it is safe, allow them to have all the power. This may include following behind on the other end of the leash while your dog keeps their ears forward and their nose to the ground, as they track a particular scent. In order to help your dog understand the difference between a regular walk, where you want them to maintain good manners, and a sniff walk, put the various behaviors on a cue. Changing to a different leash for sniff time during your walk is one way of cueing your dog to start the behavior. Another may be to signal that it is okay to start by using a verbal cue such as “go sniff” and pointing to an area for them to go to.

Another easily implemented form of enrichment is varying your path. It is easy to get stuck in a pattern of walking the same path time after time. Your dog knows exactly where and when to turn and may even show signs of reluctance once they know they are heading home. Even small variations on your walk will make it a more enriching experience for your dog.

Training as Enrichment on Walks

Training is another way to include enrichment in your walk. Positive reinforcement (reward based) training by itself can be an enjoyable way to interact with your dog. Up the ante and take your training on the go. Request your dog to follow known cues at different periods of your walk. Consider playing a game. You can plan the details of this game in advance or decide when you’re on the walk.

  • Ask your dog to “down” every time you see another dog.
  • When a car passes ask for a “high five.”
  • While hearing a funny noise cue “touch.”
  • Before crossing a street or intersection, ask for a 15-second sit.


The behaviors you choose should be easy for your dog to offer and most of all fun! This exercise is all about tapping into your dog’s brain and making them think in varying environments with natural distractions. Keep it lighthearted. There should be no penalty for incorrect or undesirable behaviors. If your dog struggles, consider making it easier for them to get it right and keep moving forward.

Choosing any one of these enrichment techniques are sure to successfully meet your dog’s mental needs and give you a reprieve from some of their unwanted hyperactivity.

10 Ways to Build Confidence in Shy and Fearful Dogs

Photo courtesy of Christine D. Calder, DVM, DACVB

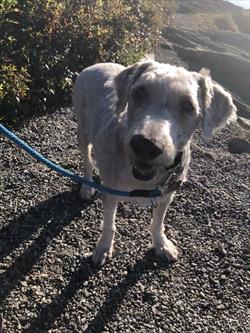
Fear is a normal emotional response in dogs that can be from a real or perceived threat. Some dogs respond with subtle behaviors that seem shy, approaching with their head carried low, ears to the side or held flat, brow furrowed with a worried look, and eyes closed or blinking. Their mouth may seem tight, or they are licking their lips or yawning. Their tail may be lowered and slowly wagging.

For other dogs, the fear is more obvious because they will hide, run away or freeze in place. These dogs often avoid eye contact and may tremble. Their tails are often tucked, and they may pant or stand completely still with their mouth closed tight and body tense. When cornered, these dogs may snap to get away and bark, charge, lunge, snap or bite. These behaviors are often misunderstood as aggression.

Help shy and fearful dogs feel safer by building trust and teaching skills to manage their fear.

  • Keep a Log
    Know what triggers your dog’s fears and keep a log to help avoid those triggers. It will also help your veterinarian decide if medication is beneficial. If triggers are hard to identify or manage, a daily anti-anxiety medication may be needed. When you know your dog’s triggers but cannot avoid them, medication can be given as needed.

Photo courtesy of Christine D. Calder, DVM, DACVB

  • Establish a Safe Haven
    Your dog can retreat to a bedroom, closet, or covered kennel to feel safer. Make sure this area is away from the normal traffic pattern in the home and has warm, soft bedding. Encourage your dog to go to this area where good things happen, such as treats given daily. This spot should be a “No Kid” and “No Stranger” zone. 
  • Avoid Using Punishment
    Your dog is scared and may be responding to a threat the only way they know how. Punishing the growl, telling them “No” or “You should know better” can sometimes make the behavior worse. Notice what might be causing your dog to feel uncomfortable and encourage your dog to move away from the threat by calling them to you and rewarding them. Reward the growl and encourage it because this is information from your dog that is not yet a bite.
  • Food Dispensing and Puzzle Toys
    These toys are a great way to build your dog’s self-confidence, helping them to problem solve while encouraging them to explore their environment. When you find a food puzzle your dog likes, feed them one meal out of it every day and change it up by freezing the food or using the grass as a natural snuffle mat.
  • Build Trust
    Building trust is an important part of our relationship with dogs. We need to respect their needs and normal canine social behaviors. Some dogs don’t enjoy being hugged or kissed. Don’t invade your dog’s personal space unless invited. Always ask them to come into your space first. Be respectful if that answer is no.

Photo courtesy of Christine D. Calder, DVM, DACVB
  • Positive Interactions are Important
    For people, shaking hands and direct eye contact is polite social behavior. In the dog world, hands reaching for them or direct eye contact can be rude or scary, triggering a fearful response. Tossing treats behind your dog gives them an opportunity to return for more instead of forcing them to take treats from a new person’s hand. Playing a game of fetch or tug or throwing a disc can build relationships while having fun.

Photo courtesy of Christine D. Calder, DVM, DACVB

Photo courtesy of Christine D. Calder, DVM, DACVB
  • Respect Your Dog’s Choices
    Dogs need some control over a situation and the opportunity to say no or fear can rapidly turn into worry. Watch your dog’s body language closely to recognize when they become overwhelmed and feel trapped. If you notice your dog is cautious, move your dog away until they are more comfortable.

Photo courtesy of Christine D. Calder, DVM, DACVB

  • Stop the Walks
    If your dog is hesitant to go on walks, doesn’t want to leave the yard or go for a car ride, don’t force them.  Traffic, people, weather, and strange noises can be scary. Give them time to feel more confident.

Nose work course. Photo courtesy of Ben Bricker.

Photo courtesy of Ben Bricker

Try playing games in the yard, go for sniff walks in quiet and safe locations, or do nose work exercises (find hidden scents around the yard or house) instead.

  • Focus Behaviors
    Your dog’s ability to predict your behavior will increase with focus behaviors such as eye contacttargeting, and a chin rest.

Eye contact. Photo courtesy of Christine D. Calder, DVM, DACVB

These behaviors also give your dog a clear way to communicate with you when they are starting to feel overwhelmed and afraid.

Photo courtesy of Christine D. Calder, DVM, DACVB

  • Foundation Behaviors
    Conditioning relaxation on a mat will give your dog a safe haven that you can bring with you to places like the vet, in the car, on vacation, and in a crate. This conditioning is a building block for more advanced behavior modification.

When it comes to shy and fearful dogs, remember that these dogs will often show improvement over time once you become more predictable in your interactions with them and they learn the routine. Take note if your dog is not improving. Sometimes medication will still be needed to help your dog feel safe.

How to Make Veterinary Visits Less Stressful

Experiencing some fear during veterinary visits is a normal reaction for pets. It’s not fun to be examined by strangers and poked with needles. Pets do not understand why they are there or that the uncomfortable procedures will benefit their health.
      

Photo courtesy of Depositphotos

       
Fear during clinic visits often leads to patient distress, discomfort, and behavior problems. If their fear and anxiety are not addressed effectively, it can worsen over time, become harder to manage safely, and can have negative impacts on their welfare. Fear and emotional distress create challenges that can prevent pets from receiving necessary care. Fear can put people at risk. You may be hesitant to take your pet in just to avoid the experience; some people are embarrassed by their pet’s behavior. Remember they are behaving this way because they are afraid, not because they are bad or trying to embarrass you.

There are several ways to reduce fear and to provide a low-stress experience. Creating that experience is a team effort between you and staff.

Body Language

Reading pet body language appropriately is the key to less stress. Handling can then be adjusted based on what the pet’s body language is saying. If the early signs of stress are ignored your pet’s behavior may escalate. Since animals learn from experience, they may skip the earlier signs entirely at the next visit, intensifying to more aggressive behaviors.

Preparation

You know your pet better than anyone else. Discuss any behavioral concerns when scheduling the appointment so the medical staff will be better prepared for your pet’s visit.
Preparation also includes making transportation comfortable. For example, cats can learn how to be more comfortable entering and riding in their carriers. Carriers with tops that are easily removed are best. Pheromones can sometimes help to reduce anxiety in the car or anti-anxiety medications may be needed. Make sure to wait until your car is at an appropriate temperature before bringing your pet to the car. Calming music, such as classical, can help block out road noise.

Happy Visits

If your dog is fearful, “happy visits” can help them feel more comfortable at the hospital. Stop by for a quick visit that involves positive interaction. Staff can briefly interact, say comforting things, and give your pet treats to improve their perception of the clinic.

What to Look for at the Clinic

  • Minimizing time in the waiting room can help reduce stress.
  • Some clinics have separate cat and dog waiting and exam rooms. Occupants of cat exam rooms should be out of hearing range from barking dogs. Others may have you wait in your car until an exam room is ready.
  • Pheromone diffusers can be used in waiting rooms and exam rooms, and pheromone sprays can be applied to towels before use. Exam rooms and waiting areas should be cleaned and sanitized to prevent disease transmission and reduce stressful scents, such as alarm pheromones or bodily secretions.
  • Calming music and limiting noise can help your pet feel more comfortable.

Using Treats at the Clinic

Bring your pet’s favorite treats. While waiting and during the exam, frozen Kong treats or lick mats can help form positive associations with the hospital. Giving treats to a fearful pet will not reinforce fear. If your pet stops eating, then their anxiety and stress level is escalating. This may be the time to stop the exam although some respond to a different type of treat.

In the Exam Room

Examining dogs on the floor and cats in their carrier, on a countertop, or in a lap is usually less stressful. Bring a non-slip mat from home. Many dogs and cats do better if they can stay with you during the exam.

Cats should never be dumped or pulled out of their carrier. Open the door and allow your pet to explore the room on their own. If your pet will not come out within a few minutes, take the carrier apart so they can stay in the bottom. Placing a towel over their body can help them feel more secure.

Cats should not be scruffed during handling. A safer, more compassionate way to handle cats is using towel wraps. Basket muzzles are ideal for dogs if they have been conditioned to wear them comfortably.

Always consider whether the planned procedures need to be completed that day or can wait. If your pet’s stress level is escalating, discontinuation of the exam or procedure may be necessary. If the visit cannot wait ask about taking a break or trying alternative approaches, such as sedation. At the end of this appointment, discuss your pet’s behavior and what could help next time.

Your veterinarian may prescribe anti-anxiety medications for the next visit. Some pets may do better with a mobile veterinarian who provides services in the comfort of your own home. Working with a veterinary behaviorist or a qualified behavior professional may be needed.


Teaching Your Dog to Love the Cone

Rocco is modeling a soft-sided lion-themed cone. These soft collars are cute and more friendly but also not as aversive as many of the traditional cones.
All photos courtesy of Sandra Robbins.

       
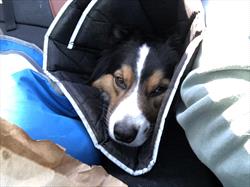
Elizabethan collars (sometimes referred to as “cones of shame”) are necessary tools to keep pets from licking a surgical site, wound, or hot spot; chewing off bandages or splints; or scratching their ears or face. By desensitizing your dog to wearing a cone, it will be less stressful for your pet if and when they need to use one. Several types of cones are available, some of which are more comfortable for the animal.
        

Rocco is modeling an inflatable cone. This version may be helpful for restraint but may not be as comfortable for the dog as a traditional cone.

     
The method detailed below is illustrated with a clear plastic cone and a dog but it works for all types of cones and applies to both dogs and cats.

Getting your pet used to the cone:

Desensitization is only effective if your pet remains calm. If your pet becomes distressed, you will need to find a way to make the training easier.

Step 1: Treats around cone.

Step 1: Introduction

  • Leave the cone assembled in a corner of a familiar room
        
  • Place it wide part down so that it is least likely to move
       
  • Put treats around the outer rim of the collar
       
  • Once a day check on the cone and put out new treats if your dog ate the previous treats
        
  • If your pet is comfortable approaching the cone for treats, proceed to the next step
         

Step 2: Treats in the cone on its side.

Step 2: Interaction

  • Lay the cone on its side
       
  • Put treats in and around the cone
        
  • Encourage your dog to approach and get treats from the cone
        
  • Your dog should see this as a game and want to move the cone for the treats
        
  • Repeat as necessary to increase your dog’s comfort with the cone
        

Step 3: Emma reaches her head in to get the treat.

Step 3: Hold the cone

  • Encourage your dog to approach you while you hold the cone
        
  • Choose to feed with either the hand holding the cone or the free hand based on your dog’s comfort
         
  • Gradually work on getting your dog to approach the narrow opening and eat treats held in a hand in the cone
         
  • Start with a hand in the cone, eventually moving the hand away from the narrow opening so your dog has to place their head through the narrow opening of the cone to eat the treats
          
  • For dogs who are afraid of the cone while it is in your hand, back up to step 2 or try leaving it on the floor and steadying it with your hand so they can approach it and eat the treats. You could also try using a higher value treat.
           
  • Repeat this step, only if your dog is eagerly participating
          

Step 4: Head in the cone

  • Hold the cone as in step 3
         
  • Have your treat hand inside the cone far enough away from the narrow opening that your dog has to put their head all the way through the narrow opening to get the treats
         
  • Hold the cone so your dog can back out comfortably without the collar getting stuck on their head
         
  • Repeat this step encouraging your dog to slip their head in and out of the cone with ease
            

Step 4a: Hold treat further from the narrow opening of the cone.
Step 4b: Emma reaches her head all the way through the cone to get the treat.

     
Step 5: Wearing the cone

  • Repeat the process from step 4, but this time allow the cone to rest on your dog’s neck and feed them treats
       
  • If your dog is comfortable, feed them treats
        
  • If not, help them out of the cone and back up to an easier step
        
  • If they can keep the cone on, encourage your dog to walk to get a treat
        
  • Repeat this process so that your dog can feel comfortable wearing the cone and walking around the house
         

Step 5a: Emma has confidently put her head all the way through the cone and is comfortable wearing it without assistance.
5b: Emma is able to walk while wearing the cone.

    
Finding an approach that will work for Rocco:

Rocco is being offered some canned cheese spread to get him to put the cone on.  Notice how he leans away and turns his head, showing hesitancy.
     

Photo courtesy of Sandra Robbins

     
Rocco approaches to investigate and decide if it is something he wants.
       

Photo courtesy of Sandra Robbins

     
Rocco decides that the exercise is too hard and backs away without getting a treat. Notice how he is licking his lips and is standing farther from the cone. To make it easier for him, Dr. Sample moves her hand towards the cone opening.
        

Photo courtesy of Sandra Robbins

     
Rocco decides it is better and approaches to take the treat.
          

Photo courtesy of Sandra Robbins

       
Now Rocco relaxes near the cone while eating the canned cheese spread.
      

Photo courtesy of Sandra Robbins

     
When we found the approach that worked for Rocco, he was able to eat treats with the cone on.
       

Photo courtesy of Sandra Robbins.