Does your dog suddenly lose control of their bladder when you get home? Or when you lean over to pet them, or while greeting visitors? This behavior may be excitement or conflict urination.
Since any disease process that affects the kidneys and bladder, such as a urinary tract infection, bladder stones, or ectopic ureters, can make it difficult for some dogs to control their bladder, these conditions must be ruled out first. Bloodwork, diagnostic imaging (radiographs and ultrasound), and a urinalysis to look for infections, crystals, and urine concentration ability help determine if certain types of liver or endocrine diseases are playing a role in this behavior.
Once all medical causes have been ruled out, it is time to consider a primary behavioral cause, such as incomplete house training, conflict urination (submissive urination is the older term), or excitement elimination (urination). Each of these behaviors has a different cause but is treated in a similar fashion. Incomplete housetraining requires going back to the basics, while conflict and excitement urination will have a different management and treatment plan.
Regardless of the cause, punishment is often counterproductive and never the solution.
Conflict urination, motivated by both fear and anxiety, often results when your dog wants to interact with you but isn’t sure you are always safe. This conflict triggers spontaneous, non-conscious urination that can occur during greetings or other direct interactions with you. With this behavior, dogs often roll on their back (a conflict behavior) before urinating, while jumping or even standing in place. Regardless, your dog doesn’t feel safe if this type of urination occurs.
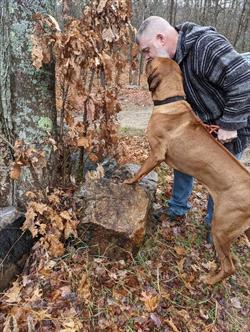
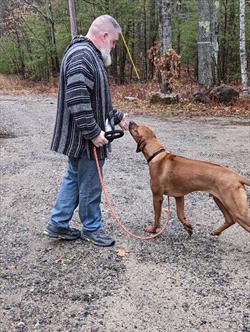
To keep your dog feeling safe during greetings, never reach for or loom over your dog. Avoid prolonged eye contact or speaking sternly. Never force your dog on their back or physically punish them in any way. Instead, greet your dog on their level and invite them into your personal space rather than invading theirs. Instead of reaching over their head, try scratching under their chin. Keep these interactions low-key and always use a calm, soothing, and gentle voice instead of a stern or high-pitched one.
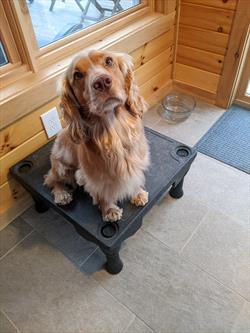
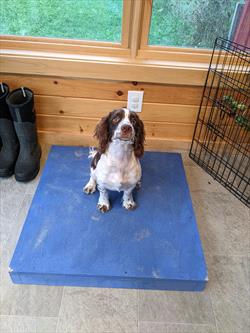
The key to changing this behavior starts by making all greetings more predictable for your dog. Consistency and predictability are key. Change up greetings by teaching your dog to station on a waterproof mat or step up onto a platform. Asking your dog to pick up a toy or using a well-known cue like touch to earn a reward gives opportunities to redirect your dog easily but also encourages interactions in a less threatening, more dog-friendly manner.
Unlike conflict urination, excitement urination tends to occur when your dog becomes overly enthusiastic during greetings. Punishment usually is not the cause of this behavior, and often, the urination occurs while the dog is wiggling in place or running towards you to say hello. This behavior has more to do with an overflowing bladder rather than a negative emotional state. To change this behavior, be sure to supply plenty of opportunities throughout the day for your dog to empty their bladder. This may mean asking for favors from friends and family members or hiring a dog walker to make sure your dog has plenty of opportunities to eliminate throughout the day.
The first step to reduce this behavior is changing your greeting ritual. The goal is to reduce overstimulation and excitement. Keep a jar of treats or a toy box handy near the door, and don’t ignore your dog. Ignoring can result in anxiety and frustration. Instead, toss a few treats or your dog’s favorite toys while you are walking through the door. Calmness is key, and playing games such as capture desirable behaviors helps teach your dog how to remain calm while building up a list of low-key behaviors that can be offered when greeting your dog.
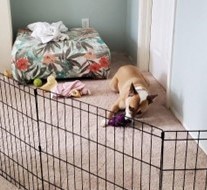
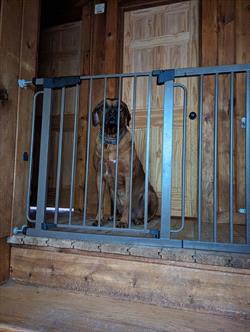
Use a safe haven, which may be a room or an area behind a gate. Place your dog here before visitors arrive, but ensure they have plenty of time to eliminate beforehand.
Once your visitors enter the home and have settled, let your dog out for low-key greetings, including cueing touch, tossing treats, or fetch with a toy. Conditioning relaxation on a mat helps your dog learn how to stay calm and relax around distractions, including visitors and in new environments.
Conflict and excitement urination can be frustrating, but it is important to remember that your dog isn’t doing this out of anger or spite. They just can’t consciously control their bladder. In the case of excitement urination, the good news is most will outgrow the behavior as they get older.
That usually isn’t the case with conflict urination. The most effective way to reduce this type of urination is to avoid punishment, encourage calmness, and change greeting rituals. If the behavior is not improving or spontaneously appears, seek help from your veterinarian. There may be an underlying medical reason why the behavior is not getting better.